Watercolor Flowers: A Beginner’s Guide to Beautiful Floral Art

Introduction
What Are Watercolor Flowers?
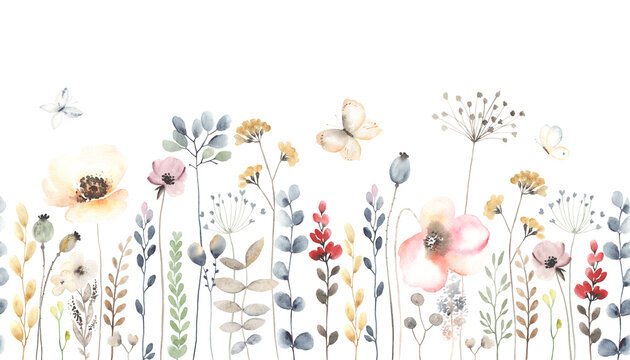
Watercolor flowers are artistic renditions of floral subjects using water-based paints. Unlike other painting mediums, watercolor offers a unique translucence and fluidity, allowing artists to create delicate and vibrant floral artworks. This medium is celebrated for its ability to capture the ephemeral beauty of flowers, from the soft gradients of petals to the intricate details of stamens and leaves. Watercolor flowers can range from simple, minimalistic representations to complex, highly detailed botanical illustrations.
Why Choose Watercolor for Floral Art?
Choosing watercolor for floral art brings several advantages. The medium’s transparency allows for the layering of colors, creating depth and a natural, luminous quality that can be difficult to achieve with other mediums. Watercolors also dry quickly, making them ideal for layering techniques and for artists who prefer a faster-paced creation process. Moreover, watercolor paints are easy to mix, providing a vast spectrum of colors that can mimic the wide variety of hues found in nature. This makes watercolor an excellent choice for capturing the intricate and varied colors of flowers.
Overview of This Guide
This guide is designed to be your comprehensive resource for watercolor flower painting. We’ll start with the basics, covering essential supplies and foundational techniques. Then, we’ll delve into step-by-step tutorials for painting different types of flowers, from simple to advanced projects. You’ll learn how to enhance your skills, explore creative composition ideas, troubleshoot common issues, and showcase your finished artwork. By the end of this guide, you’ll have the knowledge and confidence to create stunning watercolor floral paintings.
Getting Started with Watercolor Flowers
Essential Supplies
Watercolor Paints: Choosing the Right Colors
When it comes to watercolor paints, quality and color selection are crucial. Professional-grade paints have higher pigment concentrations, providing more vibrant and lasting colors. For beginners, a basic palette of primary colors—red, blue, and yellow—along with a few secondary colors like green, purple, and orange, is a good start. These can be mixed to create a wide range of hues. Brands such as Winsor & Newton, Daniel Smith, and Sennelier are highly recommended for their quality and range of colors.
Brushes: Types and Their Uses
Selecting the right brushes is essential for achieving different effects in your watercolor flowers. Round brushes, particularly sizes 6 to 10, are versatile and suitable for most tasks, including creating fine lines and broad strokes. Flat brushes are excellent for washes and broad strokes, while detail brushes are perfect for intricate work. It’s advisable to invest in brushes with good water-holding capacity and fine tips. Synthetic brushes can be a cost-effective option for beginners, but natural hair brushes like sable offer superior performance.
Paper: Selecting the Best Quality for Watercolor
Watercolor paper is specially designed to handle the medium’s moisture and techniques. There are three main types: hot-pressed (smooth), cold-pressed (semi-textured), and rough (highly textured). Cold-pressed paper is the most versatile and commonly used by watercolor artists. The weight of the paper is also important; 140 lb (300 gsm) is a good standard, providing a balance between absorbency and durability. High-quality brands like Arches, Fabriano, and Canson offer reliable options for both beginners and professionals.
Additional Tools: Palettes, Water Jars, and More
In addition to paints, brushes, and paper, several other tools can enhance your watercolor painting experience. A palette with wells and mixing areas is essential for blending colors. Water jars are needed for rinsing brushes and for clean water to mix with your paints. Masking fluid can help preserve white areas on your paper, and a spray bottle can keep your palette moist during long painting sessions. Additionally, having paper towels or sponges handy can help manage excess water and make corrections.
Basic Techniques for Painting Watercolor Flowers
Wet-on-Wet Technique
The wet-on-wet technique involves applying wet paint onto a wet surface. This method allows colors to blend seamlessly and creates soft, diffused edges, perfect for painting delicate petals and backgrounds. To use this technique, first wet your paper with clean water using a brush or spray bottle. Then, apply your watercolor paint while the paper is still wet. The paint will spread and blend naturally, creating beautiful, organic patterns. This technique requires some practice to control the flow and blending of colors, but it can produce stunning, ethereal effects.
Wet-on-Dry Technique
The wet-on-dry technique, where wet paint is applied to dry paper, provides more control and precision, resulting in sharper edges and more defined details. This method is ideal for adding intricate details and textures to your watercolor flowers. To use this technique, start with a dry sheet of watercolor paper and apply your paint. The paint will stay where it’s applied, allowing for precise brushwork. This technique is useful for painting stems, leaves, and fine details like veins on petals. Combining wet-on-wet and wet-on-dry techniques can add depth and interest to your paintings.
Layering and Glazing
Layering and glazing involve applying multiple layers of paint to build up color and depth. Each layer should be allowed to dry completely before adding the next. This technique is particularly useful for creating realistic shadows and highlights in your floral paintings. Start with light washes to establish the basic shapes and colors, then gradually add more layers to deepen the colors and refine the details. Glazing, which involves applying a transparent layer of color over a dry layer, can enhance the vibrancy and richness of your watercolor flowers.
Color Mixing and Blending
Understanding color mixing and blending is essential for achieving the desired hues and gradients in your watercolor flowers. Start with a basic understanding of the color wheel and how primary colors mix to create secondary and tertiary colors. Practice blending colors on your palette and on paper to see how they interact. Wet-on-wet blending can create smooth transitions between colors, while wet-on-dry blending allows for more controlled gradients. Experiment with different color combinations to discover unique and harmonious palettes for your floral paintings.
Understanding Flower Anatomy
Petal Structures
To paint realistic watercolor flowers, it’s important to understand the basic anatomy of different flowers, starting with petal structures. Petals can vary significantly in shape, size, and arrangement depending on the flower species. Some petals are broad and rounded, like those of a daisy, while others are long and slender, like those of a lily. Observing and sketching the petals of real flowers can help you grasp their unique forms and how they interact with light and shadow. This knowledge will enhance the accuracy and lifelike quality of your floral paintings.
Leaves and Stems
Leaves and stems are integral parts of floral compositions and contribute to the overall balance and realism of your watercolor flowers. Leaves come in various shapes, from simple ovals to intricate lobed forms, and often have distinct veins that can be highlighted with fine brushwork. Stems provide structure and can vary in thickness and texture. Paying attention to the way leaves attach to stems and how they grow can add authenticity to your artwork. Use a combination of wet-on-dry and wet-on-wet techniques to capture the different textures and details of leaves and stems.
Flower Shapes and Forms
Different flowers have distinct shapes and forms that influence how you approach their painting. Understanding the overall structure of flowers—whether they are radial, with petals arranged around a central point, or bilateral, with symmetrical halves—can guide your composition. For example, sunflowers have a large, round central disc with radiating petals, while orchids have a complex structure with various petal shapes. Studying the shapes and forms of different flowers will help you accurately depict their unique characteristics and create more convincing and captivating floral paintings.
Step-by-Step Tutorials
Simple Flower Painting for Beginners
Daisies: Easy and Elegant
Daisies are a great starting point for beginners due to their simple structure and recognizable shape. Begin by sketching a light outline of the daisy, focusing on the central disc and the radiating petals. Start with a wet-on-wet technique for the petals, applying a light wash of color and allowing it to spread naturally. Once dry, add details and shadows using the wet-on-dry technique. For the center, use a stippling technique with a smaller brush to create texture. Experiment with different color variations to add interest to your daisy paintings.
Tulips: Capturing Their Grace
Tulips, with their smooth, cup-shaped petals, offer an excellent opportunity to practice layering and glazing techniques. Start by lightly sketching the tulip’s outline, focusing on the overlapping petals. Apply a light base wash using the wet-on-wet technique, allowing the colors to blend softly. Once the initial layer is dry, add successive layers to deepen the colors and define the petal edges. Pay attention to the play of light and shadow on the petals, using glazing to enhance the tulip’s three-dimensional appearance. Practice blending colors to capture the tulip’s subtle gradients.
Sunflowers: Bold and Bright
Sunflowers, with their large, vibrant blooms, are perfect for practicing both detail work and bold color application. Start with a sketch, focusing on the central disc and the surrounding petals. Use the wet-on-wet technique for the petals, applying bright yellow and allowing it to spread. Once dry, add layers to deepen the color and create texture. For the central disc, use a stippling technique with a darker color to add depth and dimension. Pay attention to the direction of the petals and the light source to create a realistic and dynamic sunflower painting.
